How to work with layers in Photoshop?
Explore the world of Layer Styles in Photoshop, how they can improve your art and how you can arrange them effectively.
How to work with layers in Photoshop? Layers enable non-destructive editing, where you can make changes to images without having to make them permanently. Think masking on a layer mask rather than erasing parts of your layer forever, or even just duplicating your entire document to another folder while you do something a little risky to it.
Layer masks fit into this category, too. They’re quick fixes that you can apply to layers to make them stand out from the layers below them. Best of all, anything you apply to your layers – whether it’s a glow, a shadow or even a complete remodel of it via a bevel – doesn’t have to be forever.
How do you create a new layer in Photoshop?
There are two ways to create a new layer in Photoshop:
- Choose Layer > New > Layer
- Click the New Layer button in the Layers panel
Now that you know how to create a new layer in Photoshop, we’re going to look at how you can use them, focussing specifically on Layer Styles. Just like other layers, Layer styles can be stacked, and by using the Fill, you can reduce their Opacity without changing the Opacity of the layer that they’re applied to.
Remember, when you’re finished, if you wish, you can use the Rasterize Layer Style option to set it permanently – destructively, if you like. Let’s dive into how you use layer styles on a simple digital illustration, which is made up of a number of layers of selections, created with the Pen tool.
01. Make the most of bevel and emboss option
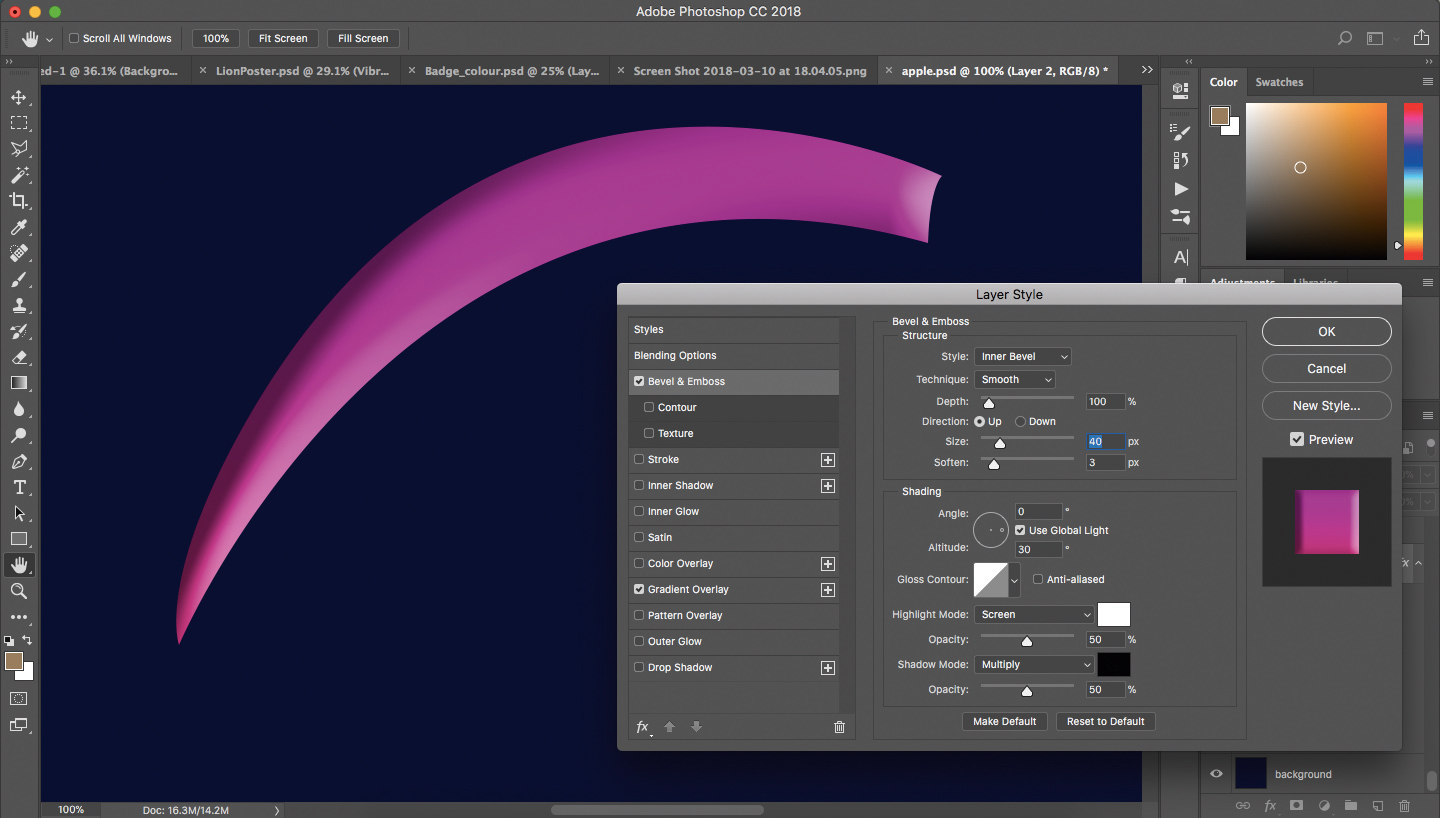
You can access bevel and emboss options by clicking Layer>Layer Style>Bevel & Emboss. You can also choose other layer styles from this window.
Bevel and Emboss are shaping tools for giving your objects subtle contour and volume. They apply natural-looking highlight and shade to your selections, and you can even go as far as to pick a specific style and smoothness of the effect.
Depth determines how dramatic the effect you’re applying is, and creates more or less light and shade. Size will determine how big the effect looks on the object, while then the Soften slider creates a rounded finish to the bevel.
The Angle option will help you to align the light from a specific direction, and Global Light will enable you to have all objects with layer styles following the same light direction. Use the Contour feature to alter the texture of the bevel itself.
Highlight and Shadow Mode are two sliders for completely controlling the light and shade, from how severe it is to how it hits the object. Use Overlay for both for subtlety, and use Screen and Multiply respectively for a more severe effect, for example.
02. Multiple ways of working with overlays
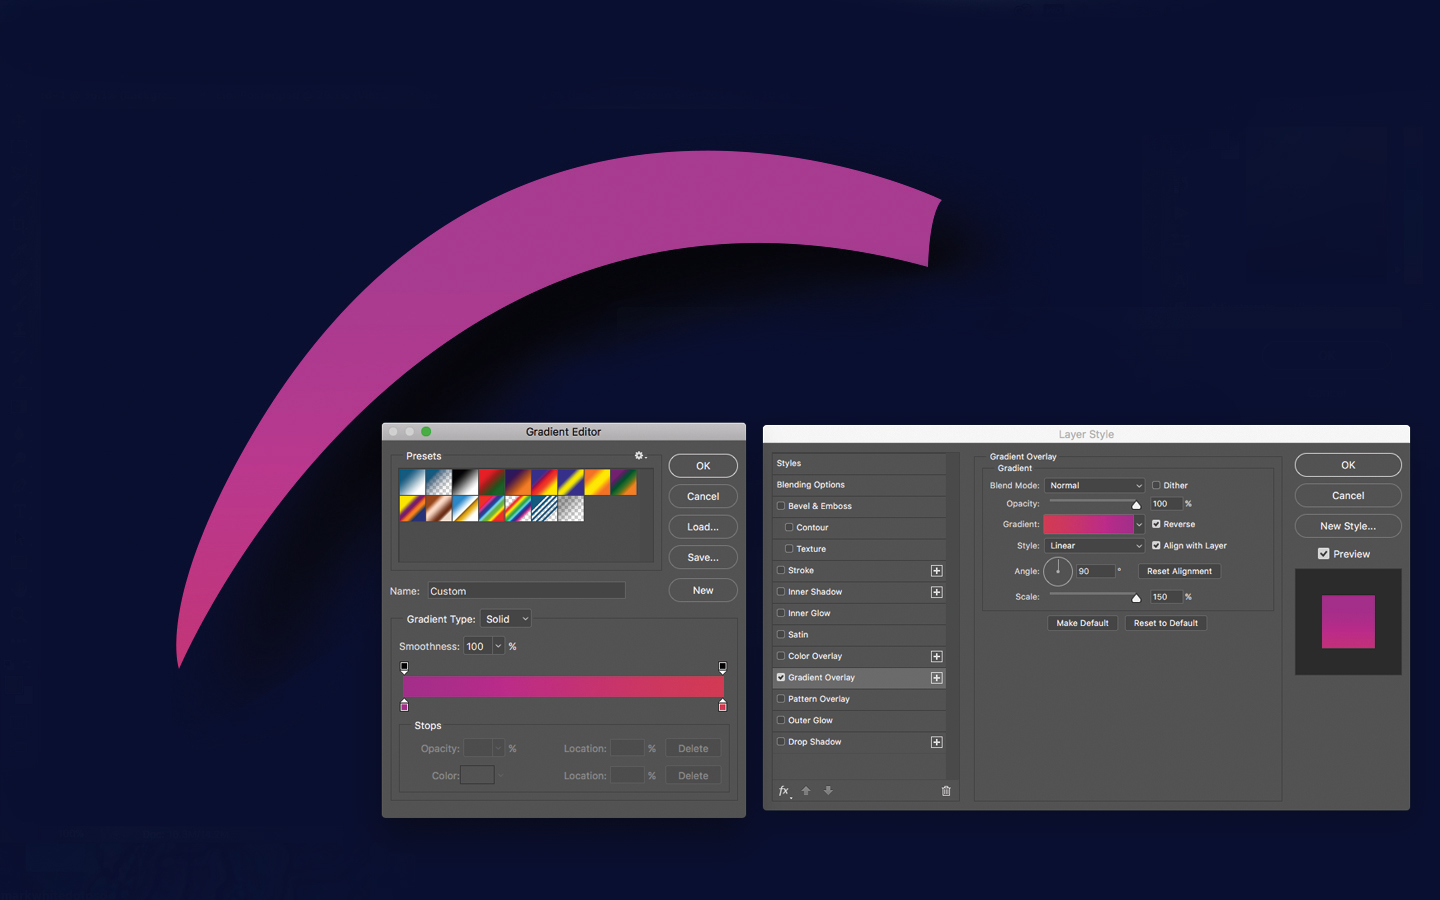
There are so many ways to fill a selection with colour, but Gradient, Pattern and Color Overlay in Layer styles are three of the most reliable. These colours will fill the object whether you move it or not, and you can even change the Overlay’s Opacity and Blend mode.
You can alter the direction that you wish for the gradient or pattern to follow, by using the Angle icon. The Gradient box should be used for selections of colour, in a similar way to how you might clip a layer to another layer as a clipping mask. Overlays are capable of altering the Opacity or Blend mode to react in different ways.
03. Apply a drop shadow to your art

When working with layers in Photoshop, the Drop Shadow is one of the most versatile Layer Styles that you’ll come across. It’s not only used for the obvious, fuzzy black space behind objects, but it can be used for an almost unnoticeable way to make an object stand out in a painting.
Distance can help position your shadow a little further away, and the Spread slider can control the density of your shadow. The size will determine how big it appears; reduce it right down to have a completely hard edge.
Blend mode and Color are what determine how your drop shadow reacts with the layers below. Choosing a dark colour and Multiply will create a shadow effect, while a light colour and Screen will introduce more of a glow effect.
And just like with the Bevel & Emboss section, Contour can help you to change the actual texture of the shadow, when combined with Noise. This isn’t commonly used, but is still worth experimenting with nevertheless.
04. Alter the intensity of light with the Glow layer styles
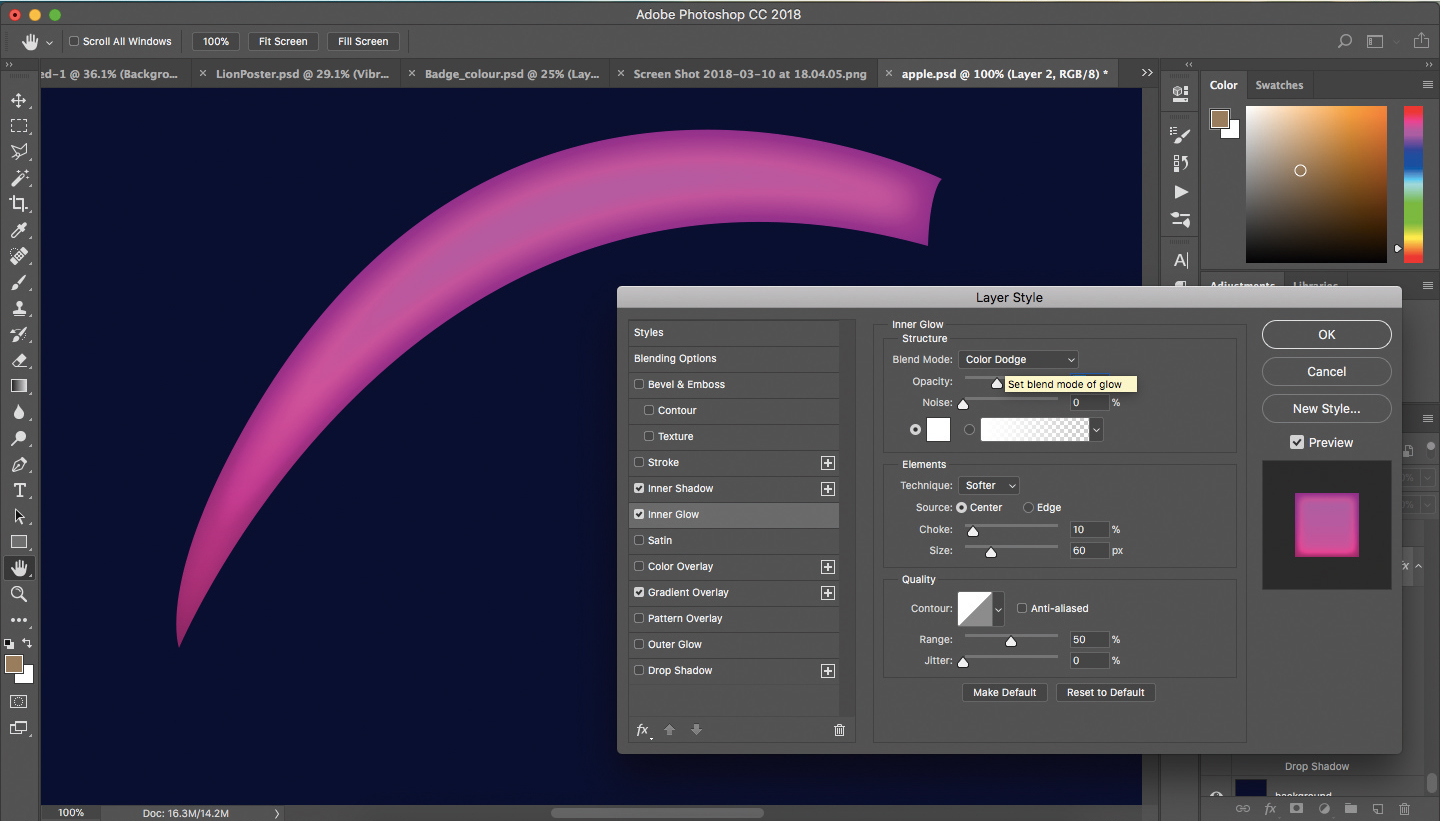
The Inner and Outer Glow layer styles are two of the most popular available for controlling light or shine. They’re mostly used just with a bright white colour, but this doesn’t mean you can’t apply them to other colours.
Pick a colour and gradient with the options available. Using a gradient can be useful if you only want the glow to appear over some of the object.
Opacity and Noise can help to define exactly how bright and clear the glow itself looks. Change the Blend mode too to alter the way the glow looks against the colours behind it
The Elements box will help you to set a Choke and Size. This controls the intensity of the glow to a degree; the smaller these numbers are, often the more realistic it looks.
05. Emphasise an object’s appearance with a Stroke

Perhaps the simplest layer style of all, the Stroke option is just a basic outline around the inside, outside or centre of your object. Change the colour and blend mode, and use it to make some selections stand out a lot more than others.
If you choose the inside option for the Position, the stroke will likely have sharper edges; if you choose Outside, the stroke will curl around pointy edges in your selection. Centre is the midpoint of these two styles.
The Size slider is the most important when it comes to Stroke. Use it to determine whether you want a thick, obvious line around your selection, or a hairline stroke to just subtly highlight a selection.
The Color and Fill Type options are there to choose the important details. Again, use a gradient if you only want a partial stroke around your object.
This article originally appeared in ImagineFX magazine issue 161; We got it from creativeblog all to improve your skill on layer using photoshop.